


IKEA pieces are a go-to for affordable, stylish, and practical home decor. But let’s be honest—sometimes the color options just don’t cut it. Not everyone wants plain white, black-brown, or walnut. And while there are plenty of creative IKEA hacks out there, like stylish furniture covers, sometimes all your pieces need is a new layer of color!
Here's the thing: painting IKEA stuff can be super easy. If you do a little bit of work before you start, it can look as good as you paid a ton for it. Let's talk about the best ways to paint IKEA furniture so you can make your room look totally different. And guess what? You don't need any fancy tools!
Why Paint IKEA Furniture?
IKEA furniture is awesome because it’s so versatile. Think of it as a blank canvas just waiting for a little creativity. With some paint and a bit of time, you can take a basic, mass-produced piece and turn it into something that feels unique. Whether you want to match your color scheme, make a bold statement, or just freshen up an old favorite, a little paint can work wonders.
And here’s the best part—it’s way easier than you might think! No need for expensive tools or pro-level skills. As long as you prep properly and have a little patience, you can get a smooth, beautiful finish that looks like it came straight from a designer catalog.
Plus, repainting your IKEA furniture is a super budget-friendly way to update your space. Instead of tossing out an old piece and buying something new, why not give it a whole new life? With so many paint colors, finishes, and styles to choose from, you can create something that’s 100% yours. It’s a fun, satisfying project that makes your home feel even more personal.
So grab a brush and let’s get painting!

The Lowdown on Painting IKEA Furniture
IKEA furniture is not the same, and some of it can be a bit of a pain to paint. Many pieces are made from particleboard with a laminate coating, which means regular solutions won’t stick well. That’s why proper surface preparation work is key to getting a smooth, long-lasting finish that won't go flaky.
Before getting started, make sure you have all your materials ready. There’s nothing worse than being halfway through a project and realizing you’re missing something crucial. Sandpaper, primer, paint for laminated surfaces, brushes, and a good sealant are the basic stuff. A bit of prep work can make a huge difference when you're after that sleek professional result.
Step 1: Prep Your Furniture
Start with a good clean when you paint IKEA furniture. Don't be fooled by appearances! Even a Surfacesurface that looks perfect can have tiny problems that you can't see, like dust, oil, and fingerprints. You can get rid of these easily by wiping them with a wet cloth. But for tough stains, you need gentle, soapy water. Just make sure the surface is completely dry first. Otherwise, you might not get the best results.
If your furniture has removable parts, like drawers, legs, or shelves, take them apart. It’s tempting to skip this but it makes the whole process way easier. Painting individual pieces separately prevents streaks and blank spots. Plus, reassembling everything after it’s painted gives it that seamless, factory-finished look.

Step 2: Sand It Down
It might seem like a lot of effort, but sanding IKEA furniture is the key to a paint job that will last. Those slick IKEA surfaces, often coated in laminate, need a little "roughing up" to give your primer something to cling to.
You're not aiming for a total makeover; a gentle pass with 120-grit sandpaper will dull the shine and do the trick. For a truly velvety finish, a follow-up with 220-grit sandpaper will smooth things out further. Finally, banish the sanding dust with a damp cloth – a clean surface is paramount for a flawless paint job.
Skipping this step could mean little specks of dust get trapped in your paint, leaving a bumpy finish. And nobody wants that!
Step 3: Prime It Right
A good primer is your secret weapon when repainting IKEA furniture. Since many of their pieces have a slick laminate finish, you’ll need a strong bonding primer to make sure the paint sticks. Shellac-based primers are a great choice for laminated furniture because they grip smooth surfaces well and help prevent chipping.
Use a foam roller or a high-quality brush to apply a thin, even coat of primer. Don’t panic if it looks a little patchy at first—that’s totally normal! Let it dry completely before deciding if you need a second coat. Whatever you do, don’t rush this step—good things take time, and skipping ahead could lead to peeling or uneven paint later.
Once your primer is fully dry, give it a light sanding with fine sandpaper for a super smooth finish. Then, you’re ready for the fun part—painting!

Step 4: Paint It
The right choice of paint can make a big difference. Latex is a great option because it’s tough and comes in so many colors. If you’re aiming for a soft, matte finish, chalk paint is another popular pick. For the smoothest, most professional look, spray painting is your best bet, but make sure you’re in a well-ventilated area.
Go for thin, even layers instead of one thick coat. It might take an extra layer or two, but it helps avoid drips and streaks. If you’re using spray paint for IKEA furniture, keep the can moving to prevent too much paint from building up in one spot.
Drying times can vary, so check your paint’s instructions, but a good rule of thumb is to wait a few hours between coats. If you rush it, the paint might smudge or peel later on.
Step 5: Seal for Durability
Once the paint is fully dry, apply a topcoat to protect the finish and keep it looking new for years. Polyurethane is great for pieces that are used a lot, like tables or dressers. You can choose from matte, satin, or glossy finishes. Just like painting, apply the sealant in thin, even layers.
Let it dry completely before using the furniture, and if you want added durability, apply a second coat. It might seem like an optional step, but if you want your piece to last, it's a step you won't regret.

Tips for Different IKEA Pieces
Painting an IKEA dresser? Taking the drawers out first makes a huge difference. You get better coverage and avoid drips inside the frame.
Want to make it even better? Swap out the knobs for something a little fancier to give it an awesome DIY furniture makeover. There are endless possibilities when it comes to choosing new hardware—think about modern metallics, classic glass, or bold ceramic to elevate the piece.
For painting an IKEA table, pick the finish that can handle regular use. Since tables wear out easily, add a few coats of polyurethane for extra protection, especially on the tabletop. For a custom look, try distressing the edges or adding stenciling after the paint job to make it look vintage.
Desks need extra attention, too. They're used every day, so make sure to prepare, prime, and seal the surface well. Use a strong finish to protect it from things like pens, notebooks, and keyboards. To add some style, paint IKEA desk legs a different color for a modern two-tone look.
Painting IKEA shelves is another thing you can do. Try using a different color on the inside than on the outside to make it look more stylish. You can also make the back panel bold for a fun touch. If you want to get creative, you can add wallpaper or peel-and-stick tiles to the back for a personal touch.
For storage units, paint the outside a neutral color and use a bold color inside for a surprise when the doors open. This adds interest without being too much. Just remember to use durable, washable paints, especially in areas that get a lot of traffic.
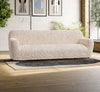
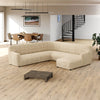
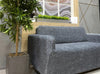
If you’re updating a space with the most comfortable IKEA sofa, try using stylish couch covers instead of painting to refresh the look of your furniture and protect it from wear and tear. It’s an easy, mess-free way to give your room a whole new vibe.

Wrapping It Up
Want to make your IKEA stuff look awesome without spending a ton? With these furniture painting techniques, it is a super easy and cheap way to do it. You can make a boring dresser pop or give an old desk a fresh look. The secret is getting ready the right way. Just take your time and follow the steps, and you'll get a finish that looks like it cost a lot of money.
Ready to get started? Grab that paintbrush, pick your favorite color, and start transforming your IKEA furniture into something totally unique!

